Step by step 10 Easy DIY Simple Nail Art Designs for Beginners
Nail art has become increasingly popular over the years, with people of all ages and genders getting creative with their nails. However, if you're a newcomer to nail art, it can seem intimidating and overwhelming. But fear not, we've got you covered with 10 easy DIY nail art designs perfect for beginners!
Polka Dot Nails:
Polka dots nails are a classic design that's easy to do and looks adorable. Start by painting your nails in a base color of your choice. Once it's dry, take a toothpick or a dotting tool and dip it into a contrasting polish color. Then, dot the polish onto your nails to create polka dots. Finish off with a topcoat to seal the design and add shine.
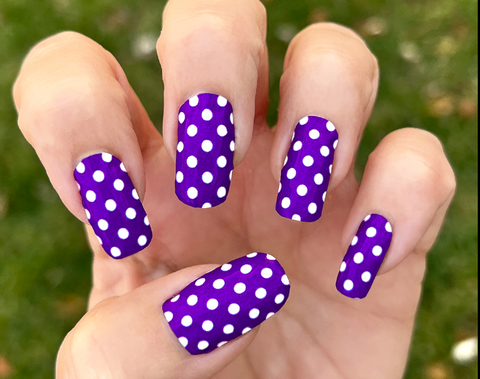
Keywords: Polka dots nails, nail art for beginners, easy nail art, DIY nail art
Glitter Gradient Nails:
Glitter gradient nails are a simple yet stunning design that adds sparkle to your look. Paint your nails a base color. Once it's dry, take a makeup sponge and dab glitter polish onto your nails. Repeat this process until you achieve the desired gradient effect. Seal the design with a topcoat.
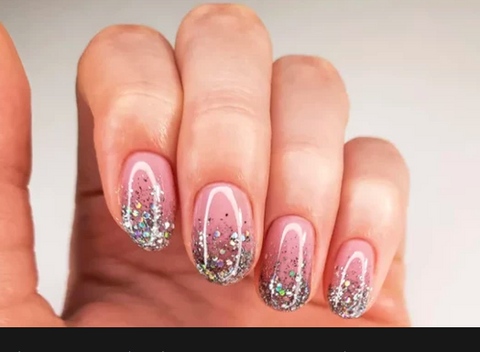
Keywords: glitter gradient nails, easy nail art designs, DIY nail art for beginners
French Tip for Nails:
French tip nails are timeless and elegant designs suitable for any occasion. Apply a base coat and let it dry. Then take a white or nude polish and paint your nails straight. If you're struggling to get a clean line, use tape to create a stencil. Finish off with a topcoat to protect the design.
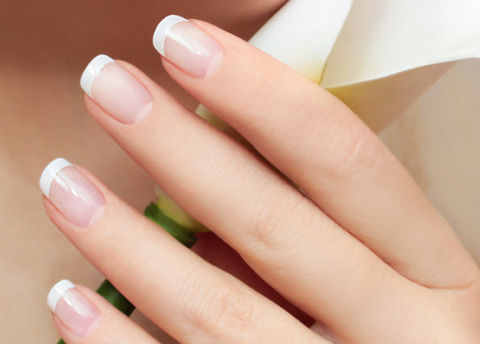
Keywords: French tip nails, classic nail art, easy DIY nail art, nail art for beginners
Striped nails:
Striped nails are a fun and easy design that can be done using tape or a stripping brush. Paint your nails a base color. Once it's dry, place strips of tape on your nails in a pattern of your choice. Then, paint over the tape with a contrasting color and let it dry before removing it. Finish off with a topcoat to seal the design.
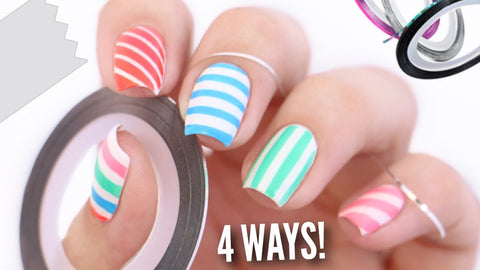
Keywords: striped nails, nail art with tape, easy nail art designs for beginners
Floral nails:
Floral nails are cute and feminine designs suitable for spring and summer. Start by painting your nails with a base color, then use a toothpick or a thin brush to paint flowers onto your nails. You can use different colors to make the flowers pop, and finish off with a topcoat to protect the design.

Keywords: floral nails, easy nail art for spring, DIY nail art for beginners, flower nail art
Ombré nails:
Ombré nails are a trendy design that's easy to do and looks great on any nail shape. Begin by painting your nails with a base color, then take a makeup sponge and dab a contrasting color onto the tip of your nails. Repeat this process until you achieve the desired ombré effect. Finish off with a topcoat to seal the design.
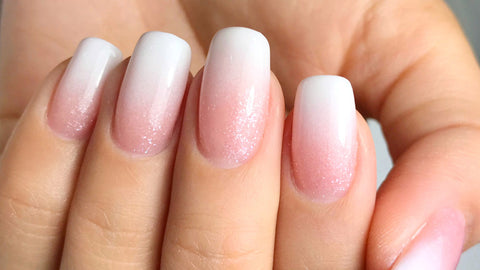
Keywords: ombré nails, trendy nail art, easy DIY nail art, nail art for beginners
Geometric nails:
Geometric nails are a modern and minimalist design perfect for those who prefer a more understated look. Begin by painting your nails with a base color, then use a striping brush or tape to create geometric shapes on your nails. You can use different colors to create contrast
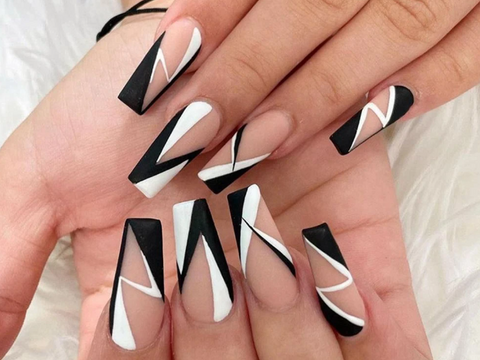
Keywords: Geometric nails, easy nail art designs, DIY nail art for beginners
